DynoCamera - Interactive camera system for UE4
Easily implement a custom 3rd person view system into your game. Solve common camera issues on 3rd person views by automatically cycling the camera when it gets too close to your characacter.
Documentation:
Well, What is it?
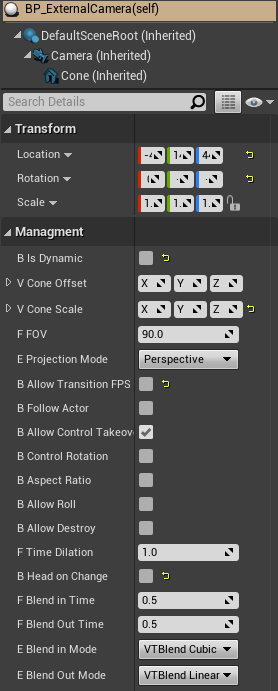
Simply put, this addon takes over the coding part of creating camera transitions for you. We achieve this by Providng an actor blueprint called BP_ExternalCamera. You can freely place liberal amounts of this actor around the scene and finetune the exposed behavioural properties to achieve the gameplay effects you desire.
Ok, How do I use it?
First, you will need to add the proper ActorComponent to the character you wish to interact with cameras. It is called AC_CameraOperations. It should be sufficient to simply drop the component inside your existing actor to get things to start working.
Now what?
Well, now it's time to create.
You can drag a few cameras (named BP_ExternalCamera) into your level, and play with their variables to achieve the transitions you wish. As a quick example of what is possible, you can boot up the Example map, and have a spin using the pre-configured character.
Here are all the avaliable options, they are aptly named to do what you mostly think they do.
Create slomo action with Time Dialation, Enable the camara to roll, etc.
The least intuitive option, worth a mention, is the Head On Change. This variable prevents the camera to trigger when the actor runs into it head on - the camera looks at the actor, the actor looks at the camera.
Add an internal camera actor for more control!
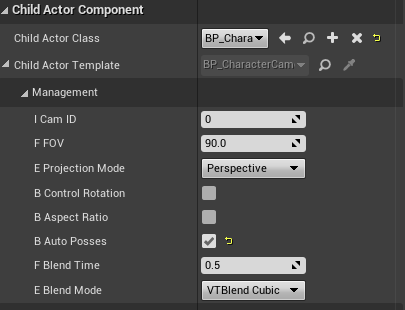
If you wish to finetune the transitions back and forth to the actor, add the BP_InternalCamera blueprint as a child actor to your character.
This blueprint has a few settings as well, shown to the right here.
The most important one to mention is the Cam ID. Setting this value to 1, and checking the "Allow Transition FPS" to off will prevent the camera from switching if this specific instance is in use.
The rest of the options are kind of self explanatory. AutoPosses MUST be enabled on at least 1 camera and disabled on the additional ones if using multiple instances within the same actor.
if you wish to further expand on how things work, it is perhaps best to watch the free tutorial series that allowed the creation of this addon. Within, all different behaviours are throughly explained.
A Free Tutorial Series
Follow along and create your own highly customizable interactive camera system to suit your gameplay needs.